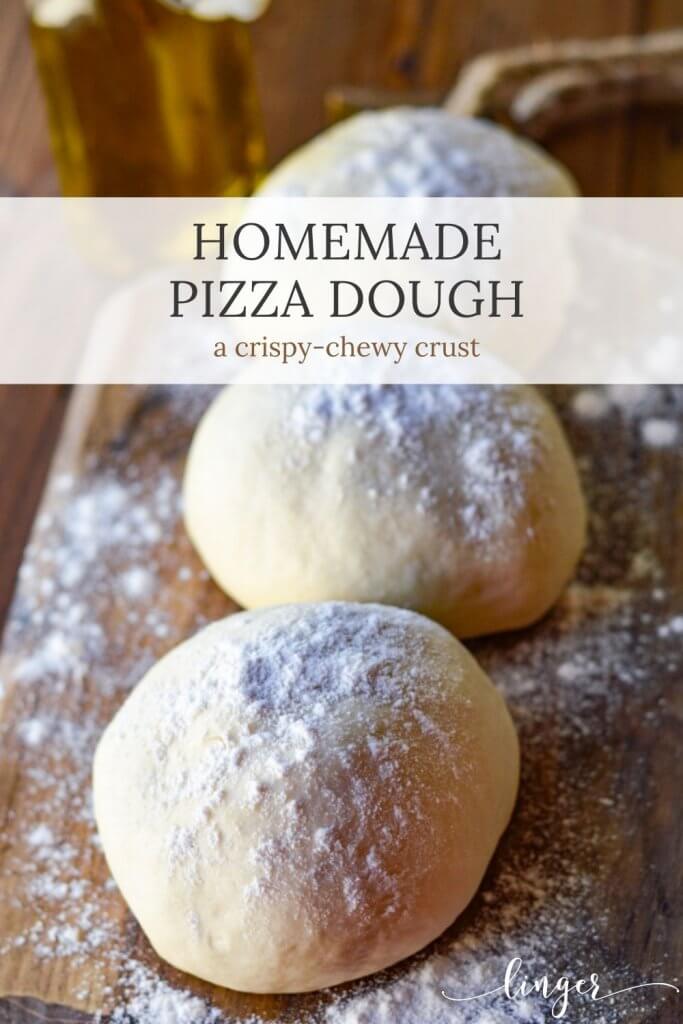
This homemade pizza dough recipe made by hand produces a crust that when you sink your teeth into it is both crispy and chewy. It lays a foolproof foundation for a variety of sauces, meats, veggies, and cheeses. The crust, in my opinion, is what truly makes or breaks the pizza. And here in this post, you have all the tools and tips to create the perfect crust.
My hope in writing this is to take the "intimidation" out of making homemade pizza dough. I definitely understand the hesitation, I had felt it for years. It always seemed a daunting and time-consuming task but in reality, it's so very easy. And there's no comparison to the store-bought box mixes. I do think you'll agree that it is quite a simple cooking project.
If you're looking for more dough recipes you must grab the link for my Dinner Roll Recipe. It is super easy with rolls that are light, fluffy, and golden brown.,
What I love about this Homemade Pizza Dough Recipe:
This dough results in a crust that is crispy on the outside yet chewy on the inside. There are a few simple tips that help in forming a really good pizza dough. I will share what I have learned from both research and trial and error.
There are only five ingredients that make this homemade pizza dough extremely cost-effective. Bread flour, active dry yeast, sugar, salt, and olive oil - that's it. Simple and inexpensive. The cost compared to the packaged pre-made crusts is pennies on the dollar. And then, of course, there's no comparison to the cost of carry-out.
Pizza dough is a fun kitchen project that the whole family can get involved in. Even the kids can help which is a great way to stir in them a love for cooking. Kneading the dough and rolling it out are ways for them to take part. Also, everybody can make their own personal pizzas with their individual ball of dough.
Step by Step Instructions
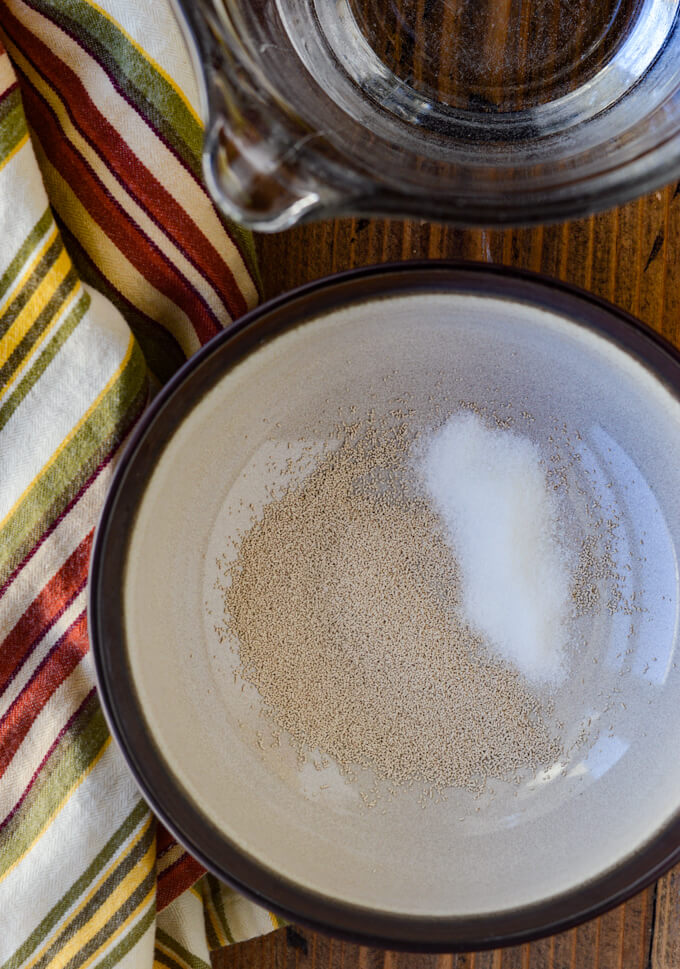
Step #1 - Activate the Yeast
Yeast is the one ingredient needed in pizza dough that causes it to rise and gives it that airy and bubbly effect. Using a small bowl, add a package of dry active yeast and a teaspoon of sugar. Pour in 1 ¼ cups of lukewarm water and stir until the yeast is dissolved. Set the bowl in a warm place like a microwave or the oven. Let it rise for 10 minutes.

When adding the water to your yeast make sure it is at the right temperature. I use my fingers when testing the water out of the faucet. It needs to be luke-warm to the touch. Not too hot or too cool. You may want to use an instant-read thermometer initially. You are looking for a temperature of 105°-110°F. Once you've played around with this for a while, you'll get a feel for it and no longer need the thermometer.
Sugar is food for the yeast and helps activate it. All you need is one little teaspoon. You can use honey or maple syrup and get the same results. Some say you don't need the sugar, but I've always added it and have gotten great results.
Make sure and use yeast that is not outdated. It will not be near as effective otherwise. Within 10 minutes after adding the lukewarm water, the yeast will have produced a foamy layer on top and will look as though it has doubled in size. That's how you know you have good yeast. No foam means bad yeast. Throw it out, and start over or the whole batch of dough will not rise very well.

Step #2 - Mix the Ingredients
Combine the salt and the flour and make a well in the middle of the flour. Pour the yeast and the oil into the well. Use a wooden spoon to mix these ingredients until combined. The dough at this point may be a little sticky, but more flour will be added as you knead the dough, which is the next step.
- What is the best flour for making this Homemade Pizza Dough Recipe? My favorite go-to flour for pizza dough is by far bread flour. In general, it has a higher protein factor which produces more gluten. Gluten is what gives the dough a stretchy elasticity resulting in the crust having a chewy characteristic.
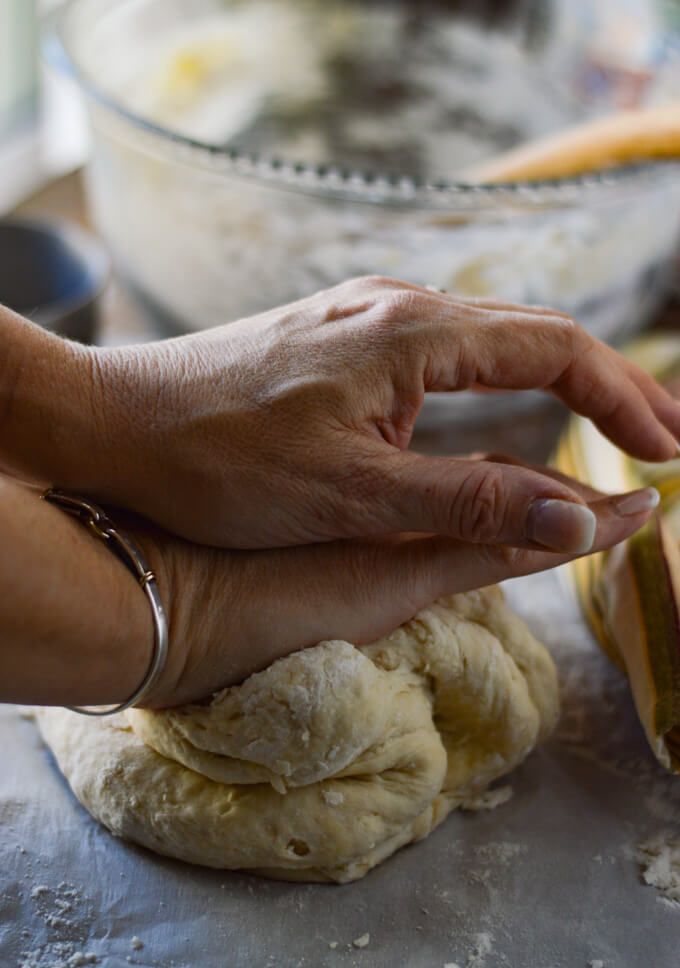
Set #3 - Knead the Pizza Dough by Hand
You can use a stand mixer to knead the dough, but I love the feel of it being worked by my own hands. Kneading is part of making the dough that seems to alarm people the most. But honestly, it's quite easy. It just takes some time and a little bit of effort. With practice, you will begin to understand the feel of it in your hands and know when it's ready.
Lightly dust a flat surface with flour and turn the dough onto it. Depending on how sticky the dough is, sprinkle a little more flour on top as needed. With the heels of your hands, push the dough away from you. Then turn it 90 degrees and fold the dough in half toward you and start again by pushing it outward. Continue this kneading process for 3-5 minutes until the dough has a silky, smooth texture.
Step #4 - Let the Pizza Dough Rise
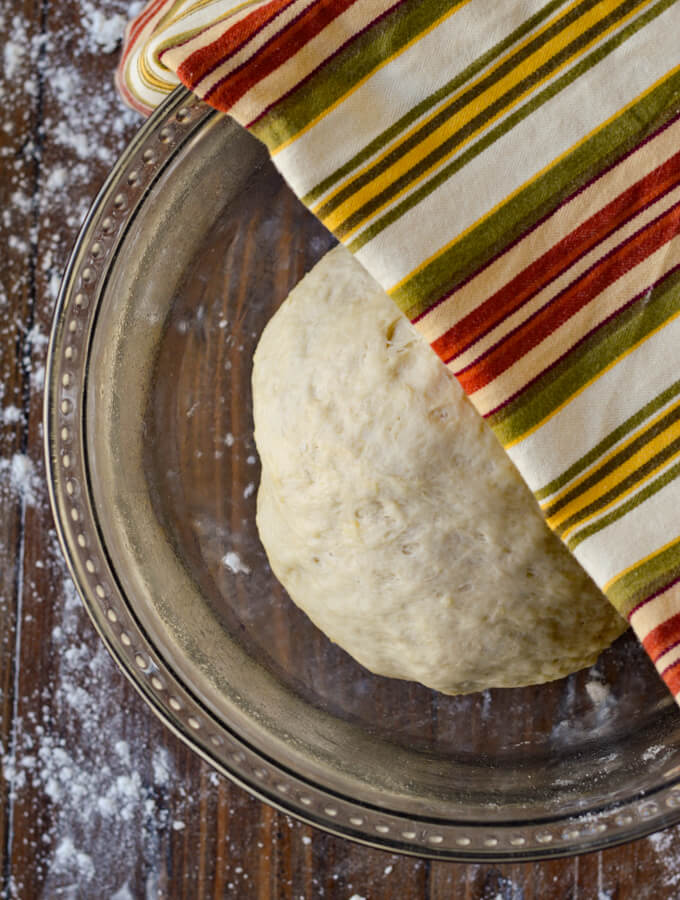
Once the kneading process is finished, place the dough in a large bowl that has been smeared with olive oil. Roll the dough around the bowl to coat the entire ball with oil. Cover the bowl with a dishtowel and set it in a warm place to rise. A microwave is a good choice or an oven that has been heated to 170°F and then completely turned off for 10 minutes. Give the dough about an hour to an hour and a half to fully rise. You're looking to see if it has doubled in size.
If you are not making the pizzas right away you can cover the bowl with plastic wrap after it has been kneaded. Place it in the fridge and store for up to 3 days. When ready to make your pizzas, remove the dough and divide it into the number of pizzas you plan on making. Let the dough sit at room temperature for one hour. At this point, you're able to roll it out and add the toppings.
If you want to freeze the dough, tightly wrap the ball in plastic wrap and place it in a ziplock bag. It can be frozen for up to 3 weeks. Remove the dough one day before you're ready to serve the pizzas and place it in the fridge to fully thaw. When ready, remove, let sit for one hour, and work as the above paragraph mentions.

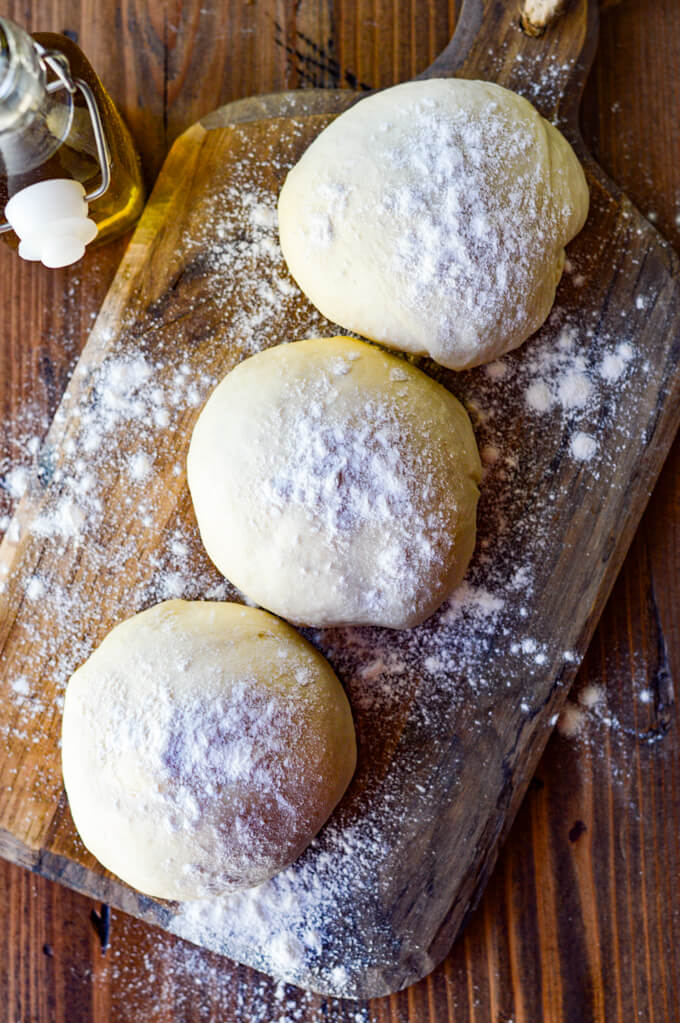
Step #5 - Roll Out the Homemade Pizza Dough Recipe
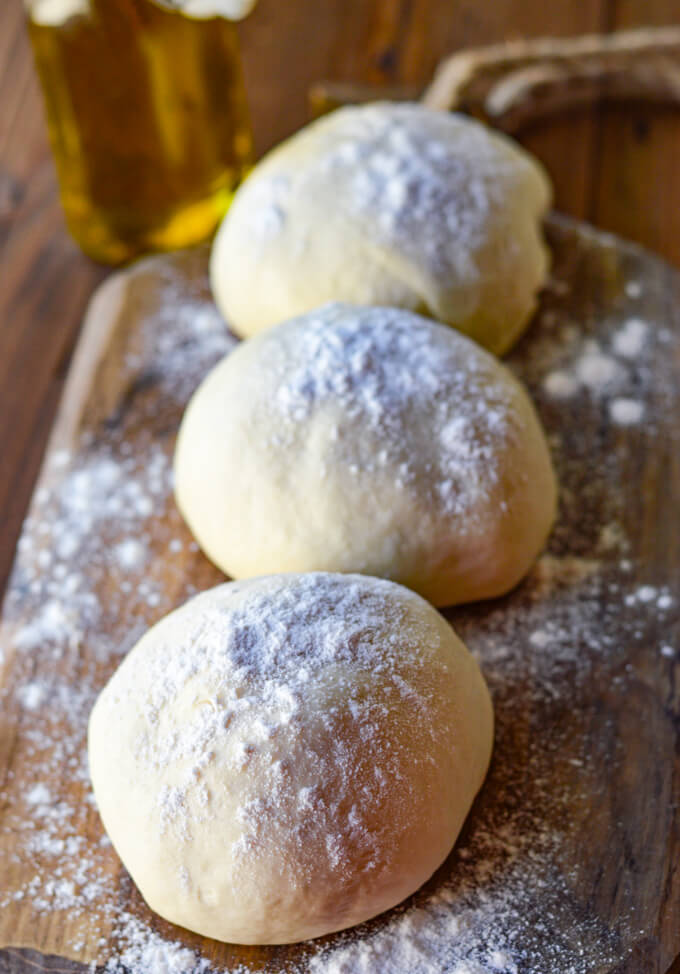
Once the dough has risen, separate it into balls and flour your working surface. With your rolling pin, roll each ball from the middle out in all directions until you have your desired thickness or you can stretch it out with your hands. You may need to sprinkle additional flour on top of the dough during this process.
If you're really adventurous, you can toss it up in the air and whirl it around like the experts. I've not perfected that maneuver, so I can't help you as of yet but this YouTube video can.
The beauty though of rolled-out pizza dough is that the shapes are never perfectly round. They have a unique characteristic that is personal and hand-crafted. I just love the rustic aspect of them.
Step #6 - Cooking this Pizza Dough with toppings
How hot should the oven be before cooking a pizza? I wish with all my heart I had a brick oven in my backyard. But, I don't, so the second-best option is to turn my oven temperature as hot as it will go, which is 550°F. If your oven goes higher, by all means, turn that baby up! I've experimented with different settings and the hotter the temperature, the better the crust turns out, both crispy and chewy.
I recommend a pizza stone mainly because it holds heat better and distributes it more evenly. If you place your pizza stone in the oven while it's preheating. The additional temperature of the stone creates a burst of heat to the crust which helps form even a crispier crust on the bottom.
After the stone has been preheated, sprinkle a bit of cornmeal then place your dough on it. This will keep your dough from sticking to the pan. Or when making your pizza, place the rolled-out dough on a piece of parchment paper, add the toppings and transfer that to the heated stone.
Three Pizzas to Make from this Homemade Pizza Dough Recipe

Meat Lovers
This recipe made three good size pizzas that fed 2 people with each pie. I chose meat-lovers (pictured above) because of the men in my house. They prefer this all-time favorite loaded with small sausage balls, chunks of bacon, large slices of pepperoni, and of course mounds of cheese.
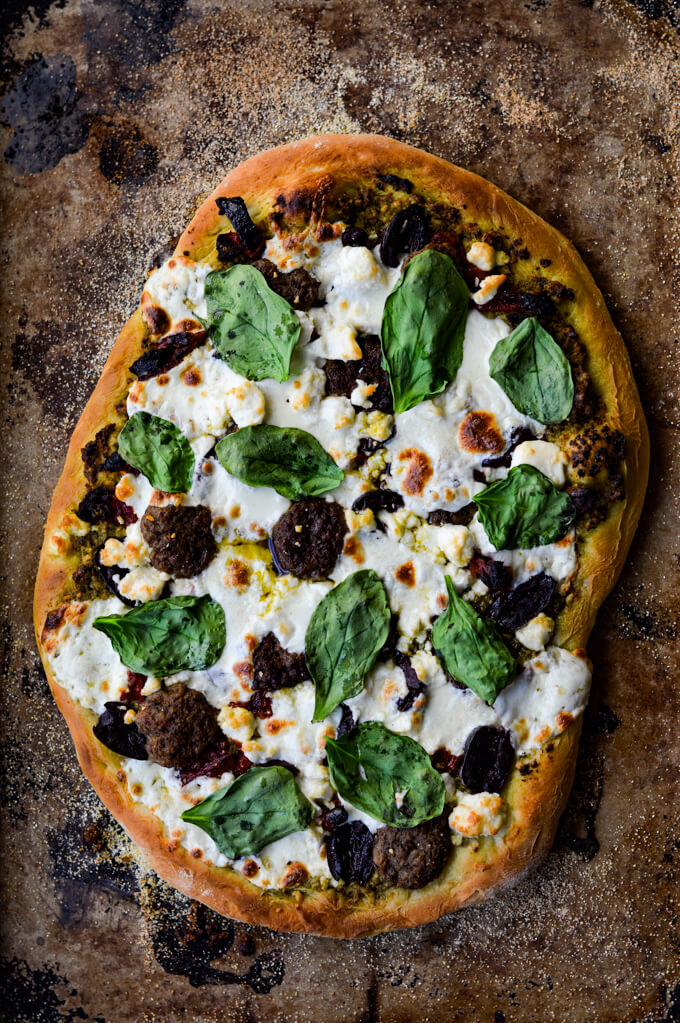
Mediterranean Pizza with Pesto Sauce
But for me, I love gourmet-type pizzas. So I chose a couple of different ideas for toppings. One is a Mediterranean-style pizza (pictured above) with pesto sauce, lamb sausage, kalamata olives, sun-dried tomatoes, fresh mozzarella, feta cheese, and spinach.

Chicken Pizza with Jalapeño Raspberry Sauce
The third pizza I made with this dough was a raspberry jalapeño sauce pizza (pictured above) with tender chunks of chicken, caramelized onions, and goat cheese. I finished it with cilantro.
A great "linger-around-the-table" idea:
Throw a pizza party with friends and/or family and have individual balls of dough ready for each person to roll out. Create a pizza bar with an abundance of sauces and toppings then let everyone go to town creating their own special masterpiece.
There is nothing like the aroma of a pan of homemade pizza emanating from the oven. It has the magical power of filling every crevice of your home with sensory anticipation. This homemade classic pizza dough recipe is the bedrock for a hundred different toppings. So, let your imagination run wild, have a blast creating, and enjoy the fruit of your labor.
Here's another idea for this Homemade Pizza Dough Recipe: Cheesy Bacon Wrapped Breadsticks
Follow me on Pinterest - Linger.
PrintCrispy and Chewy Homemade Pizza Dough Recipe
This homemade pizza dough made by hand produces a crust that when you sink your teeth into is both crispy and chewy. It lays a foolproof foundation for a variety of sauces, meats, veggies, and cheeses.
- Prep Time: 15 minutes (not including rising time)
- Cook Time: 10-15 minutes
- Total Time: 2 hours (with rising dough time)
- Yield: 3 medium size pizza crusts 1x
- Category: Pizza
- Method: Oven
- Cuisine: American
Ingredients
- 1 package Dry Active Yeast
- 1 teaspoon Granulated Sugar
- 1 ¼ cups Lukewarm Water
- 3 cups Bread Flour
- 1 ½ teaspoons Kosher Salt
- 2 tablespoons Olive Oil and extra for the bowl
- Cornmeal, for sprinkling on the pizza stone
Instructions
- In a small bowl, combine the yeast and sugar. Add the lukewarm water and stir until the yeast and sugar are both dissolved.
- Set the bowl in a warm place, like a microwave or an oven. Let it sit for 10 minutes until the yeast has doubled in size by the foam on top.
- Add the flour and salt to a large mixing bowl and whisk together. Make a well in the middle of the flour and add the yeast mixture and olive oil to the well.
- Stir the ingredients together with a wooden spoon until well combined. It will still be somewhat sticky at this point.
- Turn the dough onto a lightly floured flat surface and knead for 3-5 minutes until the dough has a silky, smooth feel.
- Smear a large bowl with olive oil and place the ball of dough into the bowl. Roll the ball around until it is fully coated with oil.
- Place a dish towel over the top of the bowl and set it in a warm place. Let it rise for 1 - 1 ½ hours or until the dough has doubled in size.
- Preheat the oven to its hottest setting - 550°F is preferred and place your pizza stones in the oven to preheat as well.
- Remove the dough and separate it into however many pizzas you are planning to make. 1 large, 2 medium-large or 3 medium pizzas.
- On a floured surface, flatten out the ball of dough. With a rolling pin, begin from the center and roll out in all directions until you have the desired thickness.
- Remove the pizza stones from the oven and sprinkle with cornmeal. Add the rolled out dough and your favorite sauces and toppings.
- Baked in the oven for 15-20 minutes or until the crust is a golden brown and the cheese is nice and bubbly.
Notes
- When adding the water to your yeast make sure it is the right temperature. It needs to be luke-warm to the touch. Not too hot or too cool. You may want to use an instant-read thermometer initially. You are looking for a temperature of 105°-110°F.
- Sugar is food for the yeast and helps activate it. All you need is one little teaspoon.
- Make sure and use yeast that is not outdated. It will not be near as effective otherwise.
- Within 10 minutes after adding the lukewarm water, the yeast will have produced a foamy layer on top and will look as though it has doubled in size. That's how you know you have good yeast. No foam means bad yeast.
- My favorite go-to flour for pizza dough is by far bread flour. In general, it has a higher protein factor which produces more gluten. That is what gives the dough a stretchy elasticity resulting in the crust having a chewy characteristic.
- Kneading the dough - with the heels of your hands, push the dough away from you. Turn it 90 degrees and fold the dough in half toward you and start again with pushing it outward. Continue this kneading process for 3-5 minutes until the dough has a silky, smooth texture.
- Set the dough in a warm place to rise. A microwave is a good choice for the dough to rise. Another option is an oven that has been heated to 170°F and then completely turned off for 10 minutes.
- If you are not making the pizzas right away you can cover the bowl with plastic wrap after it has been kneaded and store in the fridge for up to 3 days. When ready to make your pizzas, remove the dough let it sit at room temperature for one hour.
- If you want to freeze the dough, tightly wrap the ball in plastic wrap and place in a ziplock bag. It can be frozen up to 3 weeks. Remove the dough one day before you're ready to serve the pizzas and place the dough in the fridge to fully thaw. When ready, remove and work as the above note mentions.
- Turn the oven temperature as hot as it will go. 550°F is preferred if yours will go that hot. The hotter the temperature, the better the crust turns out, both in crispiness and chewiness.
- I recommend a pizza stone because it holds heat better and distributes it more evenly. Place your pizza stone in the oven while it is preheating, which will create a burst of heat to the crust which helps form even a crispier crust on the bottom.
- After the stone has been preheated, sprinkle a bit of cornmeal then place your dough on it. This will keep your dough from sticking to the pan.
Nutrition
- Serving Size: ⅓ of pizza crust
- Calories: 267
- Sugar: 1 g
- Sodium: 280 mg
- Fat: 5 g
- Saturated Fat: 0 g
- Unsaturated Fat: 0 g
- Trans Fat: 0 g
- Carbohydrates: 46 g
- Fiber: 0 g
- Protein: 8 g
- Cholesterol: 0 mg


Lindsey says
Made this for my family~ So good! Thank you
Kristy Murray says
Thanks so much Lindsey for stopping by. So happy to hear that you made the pizza dough for your family and especially happy that you liked it.
Brittany says
Excellent recipe. I love that produces a beautiful chewy crust, that chewiness is necessary! Thank you
Kristy Murray says
Thanks so much Brittany. I so appreciate you stopping by and leaving such a kind comment.
Ann says
Good, easy to make. No specific complaints only leaving a review for those looking for a very specific crust.
A bit heavier cracker crust with a bit a little chewy crust and definitively not a bubbly crust (and in all fairness, never claimed to be bubbly crust). Good, but I’m looking for something with more chew and air bubbles.
Thank you!
David Peterson says
Really great pizza dough tastes great. Made it in my bread machine on dough cycle didn’t have time to make by hand. We will definitely be making it again
Kristy Murray says
David, thanks so much for stopping by and trying out my pizza dough recipe. I'm so happy that you like it. It's great to know that it worked well for you in your bread machine.
Eric Deck says
Made it a few weeks ago, turned out great! Making more today.
Kristy Murray says
Eric, thank you so much for taking the time to leave a comment. I am so happy to hear that you've had good success with my pizza dough recipe.
Eliza says
I am new to making pizza at home and have tried a number of different pizza dough recipes. I must say this is by far the best recipe I have found! Thank you for posting this recipe, this is a keeper for sure!
Kristy Murray says
Hi Eliza. So glad you stopped by my site. And I am so pleased that you tried and like this pizza dough recipe. It definitely has worked for me over the years. Thanks so much for your comment!
Steve Cinquanti says
I've tried many different pizza crust recipes and could not get the chewy "bite" my favorite pizza shops are able top develop. This is the best by far. Thank you!
Kristy Murray says
Steve - thank you so much for stopping by and taking the time to leave a comment. I'm so glad that you were able to find a recipe in this pizza dough that gives you the results you've been looking for.
Mimilovestobake says
Our family like many others are all at home waiting out the Covid-19 threat. I rarely have time to make my own pizza while working full time but felt inspired to make our pizza from scratch last weekend. Our pizza sauce recipe made 6 cups of delicious marina and we had fresh mozzarella and lots of diverse toppings for the 8 tame and adventurous people in our family to choose from. I googled ’crisp and chewy´ to seek out a pizza crust reminiscent of the famed pizzerias in Connecticut and decided to give your recipe a try. It was as close as I felt we could come without a 900 degree temperature in our oven! Delicious! We had at least half of our sauce leftover so we are making pizzas again tonight! Everyone is excited! Thanks for a great recipe!
Kristy Murray says
Thanks so much for taking the time to leave this kind comment. It's so nice to hear how people are coping with this Covid-19 threat. Sounds like you and your family are doing well and coming up with creative ideas in the midst of it. Homemade pizza is one of the best family dinner-time ideas. I'm so glad you found this pizza dough recipe and are enjoying it. Stay safe!
James Wilson says
Great ideas and definite rules that should be practiced!! I always make a double batch and keep in The fridge over the summer. Doesn’t last more than a week - we grill over lump charcoal and it adds a wonderful char and flavour. Be careful, do not put your pampered chef over open flame. It will destroy it (crack/pop/fracture). Green Egg and others make refractory stones for just this purpose.
Add garlic, oregano, Parmesan cheese for excellent breadsticks.
Dip rolled balls or chunks in a baking soda bath and bake for surprising pretzel bites!!!
Kristy Murray says
Hi James. Thanks so much for stopping by and taking the time to leave such a nice comment. I love the idea of grilling the crust for a lovely charred flavor. Great input for breadsticks and pretzel bites. My mouth is watering for those right now.
Sandra williams says
Sitting here as well in this quarantine for almost a month now, we also were missing our weekly fix of our closed neighborhood pizzeria, Pinterest led me to this wonderful recipe, this was the very first time I have ever made pizza dough from scratch, hubby and son loved it, Hubby said it was a keeper and wants to know when I’ll make it again, I made two medium large pizzas, one made thin and baked right away, the other I rolled it out and brushed it with olive oil and let it set about an hour and half, which turned it into a hand tossed, it wanted to rise, but I was watching it. So first one was thin and crispy, second was, oh my, crisp, soft and tender, my dough was really sticky out of the mixer but hand-able , rolled between two pieces of parchment paper with no extra flour except for the quarter cup more I added in the mixer since I did not hand knead, left rolled out dough on bottom parchment then pulled on to pan, don’t own a stone, cooked at 425* on bottom rack for 15-20 minutes like I do papa Murphy’s, I also did add granulated garlic to the mix for a garlic crust.. thank you soooo much, won’t look any farther, we really, really like it... stay safe out there💗
Kristy Murray says
Sandra, thank you so much for your kind review of this recipe. I'm so thrilled it turned out so well for you and that your family loved it so much. I appreciate your added comments about rolling it between the parchment paper. I also love the idea that you added the granulated garlic to the mix. It is so thoughtful for you to take the time to stop by my site, try the pizza dough and leave such kind comments. Hope you and your family stay safe and healthy!
Ina says
Can I cook this on the grill?
Kristy Murray says
Ina, thanks so much for stopping by. And yes, you can cook the pizza on the grill. Get the grill as hot as you can. Then turn one side of the burners off. Place the dough on the side that is still lit for a couple minutes until it has light grill marks. Turn it over and move it to the side of the grill that has indirect heat. At this point, you can add your sauce and ingredients. Close the grill and let all the ingredients heat and the cheese melt. It only takes about 3 or 4 minutes. Would love to know how your's turns out.
Jane Ulmer says
I want to use 00 Flour. I made one recipe and the crust was really crispy. I am looking for more of a chewy crust. I thought the 00 Flour would give me this. Please help.
Kristy Murray says
Hi Jane. I used "bread flour" in this pizza dough recipe to get a chewier outcome. Bread flour has a higher gluten content and is what gives the crust more elasticity. The "00 flour" has a very fine texture with a lower gluten content which would definitely give a crispier crust. The flour someone chooses all depends on the texture they are looking to achieve. Since you desire your pizza crust to be chewier, I would go with the bread flour. All-purpose flour is somewhere in between those two flour types. Hope that helps.
Jane ULMER says
Thank you for your reply,. We had a really good pizza in a restaurant that was chewy I asked the Chef how he made the crust. He said was that he used 00 Flour that he imported from Naples. So, I bought 00 flour locally. I will try again with the 2nd half of the dough that I have in the freezer. I will bake the pizza for less time. If that doesn't produce the chewy crust I am looking for, I will try again with Bread Flour. Thanks again!
Kristy Murray says
You're so welcome! Good luck. Hope your family is safe and healthy.
Jane says
A couple more questions........
Do you use 2 Tbsps. oil in the crust, plus more for the bowl?
How long would you bake a pizza?
I have a Pampered Chef Pizza Stone.
Do you preheat the pizza stone in the oven?
Kristy Murray says
Hi Jane. Yes, use 2 tablespoons oil in the crust with extra for the bowl. Bake the pizza for 15-20 minutes. Also, Pampered Chef does not recommend preheating their Pizza Stones but there are many pizza stones out there that can be preheated. The difference would be the initial blast of heat on the crust that gives it a crispy bottom, but the Pampered Chef one would still work great.
Mike says
Kristy, Thanks for sharing this recipe! As many have noted, it is truly delicious. The bar is set high for this Chicago pizza lover. Crispy and chewy is spot on!! We likewise have been finding more time to do stuff like this as we wait out Covid-19. It's unfortunate that so many are suffering from the disease and the circumstance, but in a roundabout way, I think many of us needed something like this to get us back to basics. Your blog is actively inspiring and cultivating relationships.
Kristy Murray says
Mike, thank you so much for stopping by and leaving such a kind comment. And you are right about how unfortunate all of this Covid-19 is for so many people and I do agree that it has given us pause and caused us to return to some of life's basics. There is something about pizza that gives us comfort so I am happy you found my pizza dough and enjoyed the outcome. Hope you and your family are safe and healthy. Thanks again for your nice response.
Brenda Mark says
We love, love, love this recipe!!! I have tried so many different recipes for dough and we just weren't happy with any. Well, I won't be looking anymore!!! I do have a question. I am making dough right now and it has doubled. I can't make the pizza for another 2 hours. Should I punch it down and rise a second time or can I just let it sit there on counter?
Tata says
I really like the recipe I want to try this but I have question can I make this extra in hand and freeze the dough for future use?
Thanks
Kristy Murray says
Hi Tata - thanks so much for stopping by and inquiring about the pizza dough. And the answer to your question is yes. If you want to freeze the dough, tightly wrap the ball in plastic wrap and place it in a ziplock bag. It can be frozen up to 3 weeks. Remove the dough one day before you’re ready to serve the pizzas and place it in the fridge to fully thaw. Then roll it out and bake as normal. Good luck making these.
Katy says
Hi there, currently trying to make this for dinner. My dough is extremely sticky, even after kneading for much longer than 5 minutes, and adding at least 1/4 c flour. Is that normal? Do you keep adding flour until the dough isn’t sticky?
Kristy Murray says
Hi Katy - yes, you can continue adding flour as you knead the dough until you get a nice firm, silky smooth texture. Good luck! Would love to know how it comes out.
Mollie says
My dough is currently rising, but it was extremely sticky out of the bowl—I had to add at least a cup of extra flour while kneading to make it workable. I used all-purpose flour, because it’s all I’ve been able to find in stores lately. Would all-purpose vs. bread flour create such a stark contrast? Or would mixing with a wooden spoon for a longer time have helped? I followed the measurements exactly, so I’m a little perplexed as to what caused it to be SO sticky (my hands were completely caked in dough!) when it seems most people only had to use a normal amount of dusting flour. Thanks in advance for any insights!
Kristy Murray says
Hi Mollie. Thanks so much for stopping by. There are a couple of things that come to mind from your questions. The dough is always very sticky when you first start kneading and the more you knead the less sticky it will become. It develops a "skin" which shows that gluten is forming. That may not be what the issue is here with yours because you said your hands were caked in dough even after kneading. Too much water can cause the dough to be sticky as well. I haven't used all-purpose flour with this recipe, so I'm not sure how that would turn out. But you can definitely add extra flour both on your surface and on the dough itself when you are rolling it out. I do think you will be fine in the end. But I would love for you to share the outcome once you finish the pizzas. Good luck!!
lynn says
I made this just now. One of my kid said it's the best pizza crust. Thank you for the recipe.
Kristy Murray says
Hi Lynn. Thanks so much for stopping by and trying my pizza dough recipe. What a great compliment for one of your kids to say "it's the best pizza crust." I am honored.
Linda says
With limited trips to the store at this time I only have all purpose flour on hand, will that work?
Kristy Murray says
I'm so sorry Linda for the delay in getting back with you. Absolutely you can use all-purpose flour. It seems the bread flour gives it a little more chewiness. But boy, we're all substituting things nowadays, huh? Good luck!
Isabel says
Hi, what's the exact measurement of 1 package dry yeast? We only 100g packs available in our grocery, and my dough might take over my entire apartment should I empty the entire packet. 😁 Thanks!
Kristy Murray says
Hi Isabel! Thanks so much for stopping by. One package of dry yeast equals 2 1/4 teaspoons or 7 grams. Hope that helps.
Elaine says
Do you assemble the pizza on the preheated pizza stone? I had a neck of a time transferring it from parchment paper. Looked a mess, but cooked up nicely. Yum.
Kristy Murray says
Hi Elaine. I'm so sorry you had such an ordeal with your pizza. I do actually place the pizza crust on the pizza stone and then add the toppings afterward and then place it in the oven to cook. I can see how it would be hard to transfer the whole pizza onto the stone. Hope that helps and better luck next time.
judith hendricks says
Hi, Kristy...this is just the kind of pizza crust recipe I've been wanting. Most are too "bread-y" for me. I do have a suggestion for Elaine, however. I make the pizza on a sheet of parchment, then I put the whole thing, including the parchment directly onto the pizza stone. Works great. I'm looking forward to trying your recipe and techniques.
Kristy Murray says
Hi Judith. Thank you so much for your comment on this recipe. What a great idea for using a sheet of parchment paper before transferring it to the pizza stone. Would love to know what you think of the crust once you've had a chance to make it.
James says
When keeping in the fridge til later, do I knead and let is rise then refrigerate, or knead and then refrigerate- then rise for an hour before use?
Kristy Murray says
Hi James. Thanks so much for stopping by. You do knead it and place it in the refrigerator before it rises. It can sit in the fridge for up to 3 days.
Pauline Bingham says
I had never made pizza dough before but my daughter sent me this recipe so I gave it a try. I've made it several times now and it has been great each time. Thanks so much!
Kristy Murray says
Hi Pauline. I'm so thrilled that you tried the pizza dough several times and it turned out great. Thank you so much for stopping by and taking the time to leave your comment.
John G says
I haven't tried this yet, but I've been making homemade pizza dough for 2 months now. I make a 4 ingredient Neopolitan Style and more of a NY Style similar to this. I'm using Imported flour "0" Nuvola Super and i know sme flours are lighter than others. Can you translate this recipe into grams for us or at least give us the percentages used. I'd greatly appreciate it.
Kristy Murray says
Hi John. It seems everybody has been in the pizza-making mood recently. Thanks so much for checking with me. I have to admit that I really don't do the ounces to gram conversion and I would be uncomfortable giving you measurements and they end up not working for you. But I am including here an online conversion tool. I hope that helps. And good luck with your pizza dough. I'm sure it will turn out great.
Carmel York says
I like your dough a lot. If you preheat the pizza stone for a longer period of time I think the crust cooks better. Another way of cooking the pizza is to set it on the stone in a 550 degree oven and cook for 4 minutes, then turn the broiler on high and cook for another 4-5 minutes. Doing it this way, the cheese gets nice and brown.
Kristy Murray says
Hi Carmel. Thanks so much for your tips. Great ideas. Also, I'm glad you like the pizza dough recipe.
Yohenn Perez says
Made it today and it was perfect!!!
Kristy Murray says
Thanks so much, Yohenn. I'm so happy that you like the recipe.
Eric Deck says
I should say I used two 13 inch pizza pans. I just pressed the dough about halfway up the side of the pan. I cut the dough in half and it was almost 13 and a half ounces for each Pizza.
Kristy Murray says
Oh thanks so much Eric for the input. It's always nice to know how the recipe turns out for someone.
Melissa says
I tried for many years and I have tried multiple recipes trying to get the perfect consistency for my crust and I've never gotten it right until now! Thank you for the recipe! It was perfect! It was crispy outside and chewy inside and the flavor is awesome. I'm glad I finally found "The One"!
Kristy Murray says
Hi Melissa. I'm so thrilled you finally found a pizza dough recipe that you really like. Thanks so much for your feedback.
Melissa says
I've made the recipe SEVERAL times over the last few weeks. Perfect every time. I've found that it makes enough for 2 small pizzas. Keep in kind its only me and my husband now. So after the dough rises, I split it into 2 portions. I use one portion to make a small pizza. And then I put the remaining dough in a large zip lock bag and put it in the fridge for about 2 days, sometimes 3 days. It might not sound great but the dough does this amazing sort of fermentation thing, I then carefully take it out of the bag and put it on a cookie sheet (without kneading or disrupting the air bubbles that have formed), shape it into a small loaf and bake it at 425 for about 20 minutes. That leftover pizza dough makes the best little loaf of bread ever!
Kristy Murray says
Hi Melissa, I absolutely love the idea of making a small load with the dough. I will have to try that next time.
David Gallegos says
This looks exactly like the crust I'm trying to achieve. I want to make the dough today and refrigerate until tomorrow or the next day (to allow additional flavor development). Should I put the dough in the refrigerator immediately after I knead it, or let it rise first and then place in the refrigerator? Thanks!
Kristy Murray says
Hi David. Thanks so much for stopping by. I do think you will like the way this dough turns out. To answer your question, you should put the dough in the refrigerator immediately after kneading without letting it rise. When you are ready to make the pizzas, pull the dough from the refrigerator, divide for how many pizzas you plan on making and let it sit at room temperature for one hour. At that point, you're ready to roll out the dough and add the toppings. I've recently done this and they turned out great. I have frozen the dough as well. I've written how to freeze it in the notes of the recipe card. Would love to know how it turns out for you. Hope you enjoy this dough as much as my family does. Enjoy!
David Gallegos says
Hey Kristy - I made the dough as you described, and refrigerated it. After one day, I took half the dough and made a thin pizza crust. The edges were great (crispy and chewy, just like I wanted), but the center wasn't as crispy. I didn't use a pre-heated pizza stone, which I will try next time, and I think it will then be perfect. The flavor was fantastic. I actually added finely diced garlic to the dough, which really worked well.
After a couple more days, I took the other half out of the refrigerator, and instead of making pizza, I baked as a small loaf of bread (like Melissa described above). Wow! This was one of the best breads I have ever had! Thank you!
Kristy Murray says
David, thanks so much for sharing your results. I do love the idea of making a loaf out of the remaining dough.
Ella says
That is about how I make my pizza dough. Except I don't use sugar and I only add a tsp of yeast for 3 cups of flour. Comes out great every time. Margarita pizza is my favorite.
Kristy Murray says
Thanks Ella for sharing. Margarita is a favorite around here as well.
Chef Mimi says
This is fabulous! Whenever I wanted to make a pizza I just made a “regular” dough and added some olive oil to it. I guess the difference here is bread flour. I just always used a hard wheat flour. I’ve got a tip for you - back when I baked so much bread when I catered and etc., I bought yeast by the pound. I’m down to maybe about 3/4 cup in a ziplock that I keep in the freezer. I use it right out of the bag. Just made some steamed buns two days ago. The yeast always works. I think it’s less than $10. For a pound, and those little packages are costly. I’m sure the “use by” date was most likely years ago...
Kristy Murray says
Mimi, thanks so much for the "yeast" tip. You are exactly right about the little packages, they are costly if you most bread very often.
Carrie Tyler says
Isn't it funny how the seemingly simplest recipes can be our most popular!!?? It's the same for me. But, I will say that pizza dough (heck, any dough!) can be intimidating and I love you really break it down and explain how to make this perfect pizza dough! Thanks Kristy!
Kristy Murray says
Thanks Carrie. It is truly interesting how certain simple recipes can become the most popular. I just had a couple of friends over last night for a pizza party and it was so much fun.
Stevo says
Best pizza dough recipe I’ve used by far. Perfectly crispy and chewy all at the same time. Wouldn’t change a thing.
Kristy Murray says
Hi Steve. Thanks so much for taking the time to comment. I'm so thrilled that you like the dough.
Mylene says
Just made this dough recipe and it turned out really good! Surely for keeps! Thank you for sharing the recipe ❤️
Kristy Murray says
Thanks Mylene. So happy you tried the pizza dough and you like it. It's definitely a staple around our house. Thanks for taking time to leave a comment.
Joy says
Love this recipe. It is so easy and quick. My family loves it. Thank you
Kristy Murray says
Thanks so much Joy. I'm so happy you and your family love this recipe. It really is one of our favorites.
D.R. Cote says
Home run, actually, a grand slam! My wife and I loved the flavor and texture of the crust. I love how easy it is to work with. This recipe is sensational and I thank you very, very much for sharing.
Kristy Murray says
Awwww. Thank you so much. I'm so happy that you and your wife love the crust so much. It is a favorite around our home. Enjoy.
Taryn says
Hi there - wondering if you can use instant yeast in this recipe instead? And if so, do you use the same amount as the active dry yeast in the recipe?
Kristy Murray says
Hi Taryn. You absolutely can use instant yeast, the same amount as well. It may not need to rise as long though. Thanks so much for stopping by and checking on this. Good luck.
Lena says
This recipe delivers! Nose false advertising here ladies and gentlemen this is the best pizza dough I have ever made.
I stumbled on this recipe when my sourdough pizza crust failed for some reason and I really wanted to make pizza so here I am, one happy camper!
Kristy Murray says
You're so Kind Lena. Thank you so much. I'm so thrilled that you love this recipe. This is one of my top recipes on my blog believe it or not. I've gotten so many great responses and I'm so happy to add yours to them as well. Enjoy!
Alyx says
Excellent dough and very simple.
Kristy Murray says
Thanks Alyx. I'm so happy that you found the dough to be a good recipe. This pizza dough is one of my top recipes. Enjoy!
Amanda Gomez says
I have never made my own pizza dough prior to finding your recipe - and now I have made this 3 times since New Years Eve and it is perfect every single time!! It passed the group of 16 & 17 year old boys test with zero leftovers & non-stop happy eating noises and I'm even making more dough tomorrow for my son's girlfriend 🙂 Thank you for sharing this!
Kristy Murray says
Thanks so much Amanda for sharing. I am so very happy that you and your family are enjoying the pizza dough recipe. It really is crazy how easy pizza dough is to make. Thanks again for taking the time to leave a comment.
KM says
I feel like I’ve tried about 6000 pizza dough recipes and I’ve never been satisfied with them. This one? This one is a winner; I’m 100% satisfied. This is basically the same as - better than? yeah, better than - take out pizza dough with a perfect chewy, crispy crust.
We used the first batch to make East Coast garlic fingers and it was amazing! Can’t wait to try our fave pizza toppings on this stuff.
(For those, like me, who don’t keep bread flour on hand, you can amend AP flour by adding 1 tsp gluten per 1 C flour to make something like bread flour.)
Kristy Murray says
Makes me so happy you found the pizza dough "winner." This recipe is the top recipe on my blog. It always seems to work out great. Thanks so much for taking the time to share. Love the idea of East Coast Garlic Fingers out of it.
Lena says
This is my go to pizza crust. I do it with cold fermentation for two full days, really improved the flavor.
Kristy Murray says
Hi Lena. Love the idea of cold fermentation for two days. Thanks so much for sharing. And I'm so happy you have this pizza crust as your go-to.
Lena says
Give it a try, it makes a nice alternative.
Kristy Murray says
Well I'm gonna definitely try it Lena! Thanks again.
Lena says
Let me know what you think of it!
Lena says
This weekend I added about 3/4 cup of sourdough starter to the dough. I followed the recipe, this was an addition. I did it mostly for flavor, it did give a little more loft to the dough after a day and a half cold proof. Yum!
Rochelle says
Can someone tell me if this pizza dough will be good for grilled pizza? Thank you
Kristy Murray says
Hi Rochelle. Thanks for stopping by and asking the question about grilling this pizza dough. Yes, you can grill this dough. A grill acts more like a wood fire oven and gives it a nice smoky flavor. Just make sure you oil the grates well and oil the dough also. Get your grill really hot and place the dough on the grates without the topping. Cook for about 2 minutes until the top begins to bubble. Flip it over onto a cookie sheet then top with sauce and toppings. Slide it back onto the grill, close the lid and cook for about 2 or 3 minutes or until the bottom is slightly charred and the cheese is bubbly. Enjoy.
Julia Pirani says
Kristy, your recipe is my go-to. I found it during the pandemic and my wife and I have almost religiously made pizza at home every Sunday for 3 years. We make this same dough for three now as our little one is now 2. I love it. I sometimes have a hard time getting it thin enough to throw on the hot stone but I do my best and piecemeal it if I have to. Anyway, you should know we love the taste and it's a staple in our lives. Love to you and your family
Kristy Murray says
Thank you so much for taking the time to share. I'm so very happy that you are enjoying the pizza crust. It is definitely a stable around our house as well. Who doesn't love homemade pizza!!
Randall yates says
At what temperature can I use this dough using my Gosney rock box pizza oven
Kristy Murray says
Hi Randall. I'm so sorry it took so long to get back to you. Somehow your comment got lost in the shuffle. My kids recently gave me an oonie pizza oven as a gift and when I make these now I get the pizza oven as hot as I can. Between 600 and 700°F.
Awaiting the Blessed Hope says
I will be attempting my first home made pizza using your recipe. I don’t have a pizza stone so what's your suggestion for using a 9x13” baking pan? We love thick crust so would be great to know it can be baked up thick! Thanks very much.
Kristy Murray says
Thanks for stopping by and asking about the pizza dough. You can definitely use the 9x13 baking pan. You will just want to let it get really hot while you preheat the oven before you add the pizza to it. You can make a thick crust with this recipe, the cooking time will be longer though. Check the bottom of the crust to make sure it is nice and crisp before you take it out. You might consider pre-baking the crust by itself for about 10 minutes before adding the toppings. The thick crust has a tendency to get soggier in the center. Good luck.
Deborah S says
I made your pizza recipe today and I it came out great. The other half I will bake less because I like the chewy and crunchy.
Kristy Murray says
Thanks so much Deborah for taking the time to leave a comment. I'm so happy you like the recipe!
Laura Migliore says
What can I say. I have been on the search for the perfect pizza crust recipe. Cant stand a cardboard tasting crust. This dough was a dream to handle, and rose beautifully. It had a great chew. My 8 year old grand daughter took one bite, and said, "mmm Grandma, this is the best pizza I ever ate in my life." I have a large pizza stone, so made one slightly thicker crust. Used Raos pizza sauce, with whole mild mozzarella and a little parmesan. The cold hadn't quite killed off our basil, so we tore some of the leaves to have on top as soon as it came out of the oven.This is my new go to recipe. Thanks so much.
Kristy Murray says
Awww Laura! Thank you much for such a kind comment. I really am happy you found this pizza dough recipe. It truly is our favorite around this house. Hope you continue to enjoy!
Chris Waters says
I've been making homemade pizza dough for years. I had some successes and plenty of disappointments. This recipe was an absolute success. I followed the recipe and directions to the letter and the crust came out perfect. It was chewy with a crispy exterior, exactly what I was looking for! This will be my go-to pizza dough recipe from now on.
Kristy Murray says
Thanks so much Chris for taking the time to leave such a nice comment. I'm so thrilled that you landed on my pizza dough recipe. Enjoy!
Lena says
I make pizza weekly and I’m luck to have found this recipe. It is everything I want in a dough. Crispy and chewy. I have ventured into cold fermented dough, I make this recipe 5 days ahead and put it straight into the fridge to rise for the 5 days. It makes a great recipe even better.
Kristy Murray says
Thanks so much Lena for the nice comment. I love the idea of cold-fermenting the dough. What a great concept. I will have to try that.
Tammy Brown says
This recipe for pizza dough is my go to for all my pizzas from grilled to oven baked.
Always turns out and is consistent.
Kristy Murray says
Thanks so much Tammy. I'm thrilled you enjoy the pizza dough. It is definitely a favorite of our family.
Lori Winters says
I was on a search for the perfect pizza dough! I stumbled upon this one, and I stopped looking! It makes a thin crust and is magically chewy and crispy—exactly what I wanted!
Kristy Murray says
Thanks so much Lori.
Victoria says
Hi Kristy,
My heart went out to you upon reading that you wished with all your heart you had a wood fired oven in the back yard. I too have felt the same way but my husband and I balked at both the cost of buying one and then the palaver of having to get it to temperature over the course of hours! Consequently, we have just been going out for pizza at a great Italian restaurant across town. I have to say though, at $35 a pizza, this had become an expensive option. Recently, , I came across an article for the Breville Pizzaiolo oven which consistently scored 5 star reviews from happy customers -apparently, it is the first bench top oven to reach 400 degrees Celsius. So, we took the plunge two weeks ago! It did come at a cost - we paid approx $1000 (Australian dollars) and this was on special discount too. It is worth every cent. We have made pizzas on three occasions since and have been blown away by the results each time.
Because I have been relying on the restaurant for my pizza fix, I am now playing ‘catch up’ on my dough making, hence my finding your blog on my net travels. I am now highly motivated to perfect my dough making because this oven ticks all the boxes. It reaches temperature in about 15 minutes and cooks the pizzas to perfection within 2 minutes and 15 seconds. It does take up some bench space because we insist on keeping it ready at hand in the kitchen.
Who knows, you may already know of this marvellous appliance, but just in case you don’t,…
A
Thank you for sharing your expertise with us all.
Kristy Murray says
Thanks so much Victoria. And btw, I received a wood fire pizza oven since this posting and I do absolutely love it.
Kelly says
Hi just made this pizza dough. It is phenomenal. It is a game changer, hoping that in the future I can invest in a pizza oven because right now my house is an oven.! thank you for the recipe. Hopefully they’ll be more to come.
Kelly in Florida
Kristy Murray says
Thanks so much for taking the time to share Kelly. I received an Ooni pizza oven from my kids for a gift last year and wow it is amazing with this dough. It is so worth the investment. But honestly the pizza dough turns out amazing just in the oven. But you're right, it definitely heats up the house, especially in summer.
David @ Spiced says
I absolutely agree with you, Kristy - the pizza dough/crust makes or breaks the pizza! I've had some amazing crusts, and some not-so-amazing crusts...the crust matters! I love all of your little tidbits of helpful tips in this recipe. We've been making homemade dough for years, but I want to give your version a try sometime soon. You can't ever have enough good dough recipes!
Judee Gluten Free A-Z Blog says
There is nothing like homemade pizza and it's all about the crust. This looks amazing.
Kristy Murray says
Thanks so much Judee.
Noah says
Phenomenal. I only wish I had a high temp pizza oven to really crisp up that dough. I have used bob's red mill bread dough, and that was fantastic. However, bob's red mill "00" dough makes this recipe pizza parlor quality. Highly recommend the 00. So easy to work with that dough, and it doesn't seem to matter how thin you stretch it. It does not tear.
Kristy Murray says
Thanks Noah.
Deepa Garren says
I have tried many different pizza dough recipes over the years and this one is the most simple and best tasting one .My family and I love it ! Thank you !
Kristy Murray says
Thanks so much Deepa. I'm so happy you enjoyed the dough recipe.
Suzanne says
This has been my go-to recipe for at least 100 pizzas, now. My only comment is perhaps use semolina floor for dusting instead of cornmeal if you don’t want that crunchiness. Semolina won’t absorb into the dough, so it prevents sticking and helps the dough slide nicely off a peel onto the stone.