

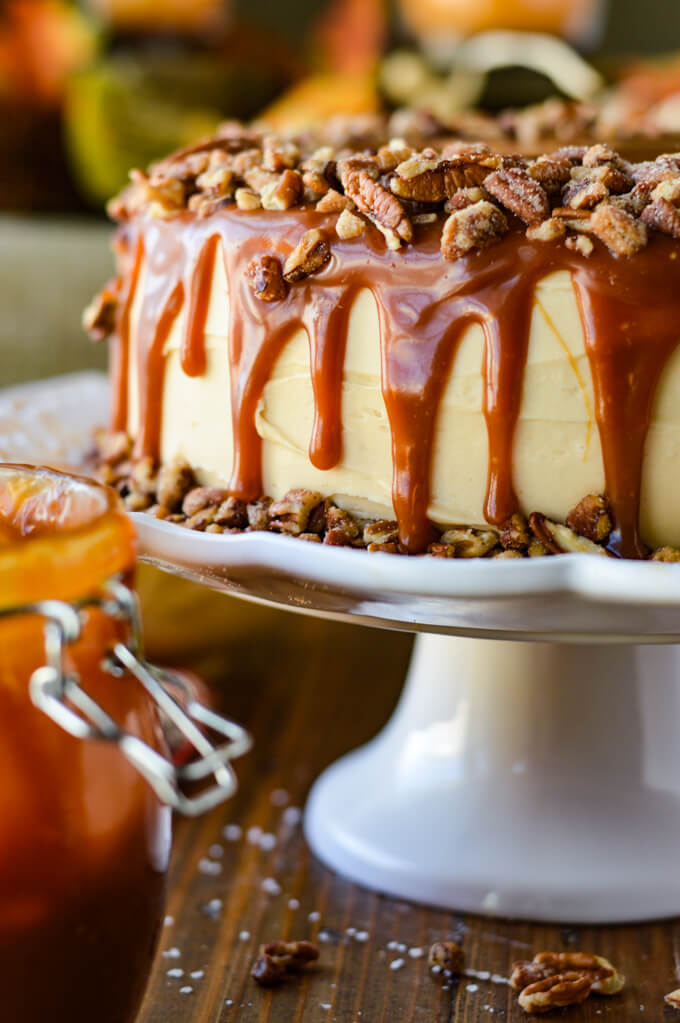
Savor the sumptuous layers of this Pumpkin Spice Cake with a velvety Cream Cheese Frosting. To top it off, this cake boasts Homemade Salted Caramel Sauce and is crowned with glazed pecans. You'll not be disappointed for this exquisite cake to be the centerpiece of your holiday table this year. It will most definitely leave a lasting impression on your guests.
Autumn ushers in a pumpkin craze, with pumpkin-infused creations taking center stage in our Fall culinary traditions. The allure of pumpkin spice elevates an array of desserts, breads, and cocktails. Among my personal favorites is the Pumpkin Spice Martini, a libation brimming with rich pumpkin flavors. A cherished holiday classic, the Pumpkin Cake Roll, stands as a perfect seasonal indulgence.
But don't stop at pumpkin alone. For a delightful change of pace this fall, consider my Puff Pastry Apple Galette - a delectable dessert that captures the essence of the season. Or venture into the world of layered decadence with my Layered Gingerbread Cake Recipe, an irresistible treat sure to delight your taste buds in every way.
Key Ingredients for Pumpkin Spice Cake:
Ingredients For the Cake
- All-Purpose Flour - When measuring flour, fluff it while it is in its canister, then spoon it into the measuring cup. Use the flat straight edge of a dinner knife to scrape off the excess flour.
- Leavening Agents - Baking Powder and Baking Soda are chemical leavening agents that cause the batter to rise when baked.
- Salt and Spices - Cinnamon, Ginger, Ground Cloves, Fresh or Ground Nutmeg, and Cardamon
- Pumpkin Puree - Go with the canned because it is so convenient and there is really not a lot of difference between it and fresh.
- Granulated Sugar
- Canola Oil - I chose oil instead of butter for a more moist and tender cake.
- Eggs - Make sure and bring the eggs to room temperature before adding them.
- Vanilla Extract - Choose pure vanilla extract instead of imitation if at all possible.
- Crean Cheese - Room Temperature
- Butter - Room Temperature
- Powdered Sugar
- Thick Salted Caramel Sauce - You can use store-bought caramel sauce, but if you do, spend a little extra on the more expensive, thick sauce.
- Pure Vanilla Extract
- Caramel Extract (optional)
- Glazed Pecans (for topping)

How To Make Pumpkin Spice Cake/It's Easier than You Think
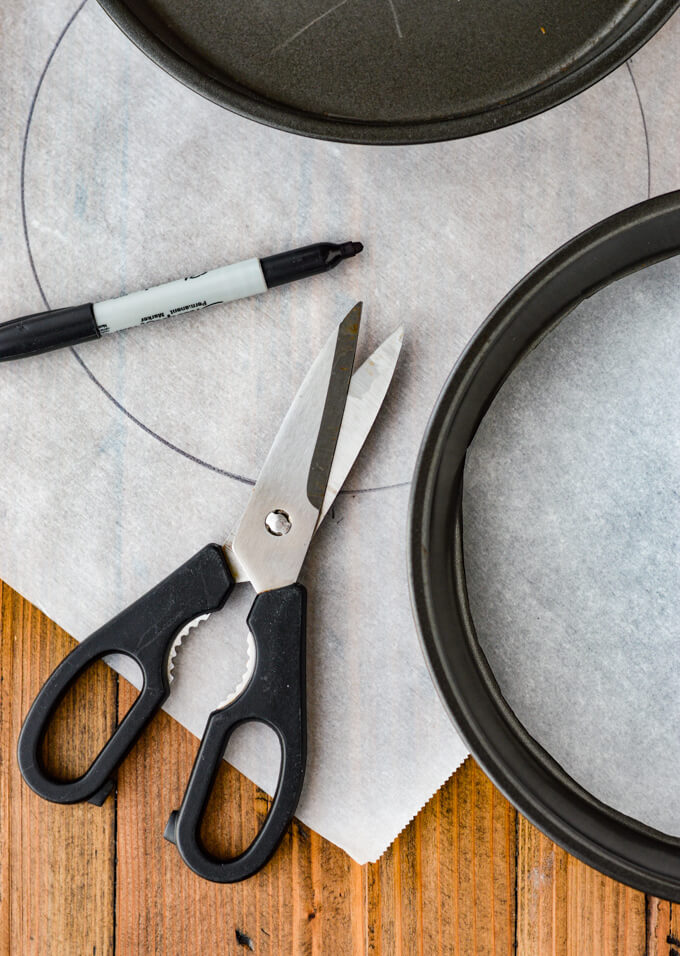
- Prepare the Cake Pans - Cut a large sheet of parchment paper to fit the bottom of two round cake pans by tracing around their perimeter. Spray both the bottom and the sides with Pam before adding the parchment paper.
- Combine the dry ingredients - flour, spices, salt, and leavening agents. Whisk or sift these ingredients together to ensure they are thoroughly incorporated for consistent batter.

- Mix the wet ingredients. Using a hand mixer, blend pumpkin puree, sugar, oil, eggs, and vanilla until well combined.
- Add the pumpkin mixture to the flour mixture. Create a well in the dry ingredients and fold in the pumpkin mixture until fully combined.

- Fill the round pans with Batter - Fill each cake pan ¾ full for a tall dome, leaving room to level the top and yield two halves per round cake. This recipe provides extra batter for mini bundt cakes or cupcakes if desired.

- Bake the cakes in a 350°F Oven - Due to their thickness, bake the round cakes at 350°F for about 55 minutes. After baking, allow them to sit for five minutes before removing from the pans.

How to Make the Cream Cheese Frosting for this Pumpkin Spice Cake
- Combine Cream Cheese, Butter, and Powdered Sugar - Begin with room-temperature butter and cream cheese. Beat them, then add powdered sugar until the mixture is smooth to avoid lumps in your icing.

- Add the Caramel Sauce - Blend Salted Caramel Sauce into the cream cheese frosting until fully combined.

How to Layer the Pumpkin Spice Cake with Cream Cheese Frosting
- Slice the Cake Layers - When cutting, begin by removing the domed top with a long serrated knife. To ensure consistent slices, use a "lazy Susan" or cake turntable. Insert the knife horizontally about halfway down the cake and turn the lazy Susan while sawing back and forth.

- Frost between the Layers - Begin by spreading a generous cup of icing on the bottom layer, ensuring ample coverage at the edges. As you work layer by layer, press gently to keep each layer level, and add another cup of cream cheese frosting each time until you reach the top.

-
- For the top layer, use the sliced cake portion originally from the bottom. Place it cut side down to achieve a smooth and even top for this layered Pumpkin Spice Cake. (See photo below)

- Create a "Crumb Barrier & Freeze - Apply a thin layer of frosting on the top and sides of the layered cake to create a crumb barrier. Freeze the entire cake for about 20 minutes until it's firm, ensuring a clean, crumb-free finished cake.

- Frost the Entire Cake with the Cream Cheese Frosting - Once out of the freezer, evenly frost the entire cake, starting with the top and moving to the sides. Use a lazy Susan or cake turntable and an offset spatula for a smooth finish. Return the cake to the freezer for 20 more minutes.

- Drizzle with Salted Caramel Sauce - Ensure the cake is well chilled before applying the caramel. If using really thick sauce, warm it slightly before drizzling it down the sides. Spoon it onto the cake (see photo above), turning slowly to coat all sides. Finish with more caramel sauce on top.
- Add glazed pecans - The final touch for this Pumpkin Cake is glazed pecans. Simply purchase glazed pecan pieces and sprinkle them around the top and bottom edges of the cake.

Can You Make the Recipe for Pumpkin Cake Ahead of Time?
- The baked round cakes can be made in advance and frozen. Make sure and cool them completely, wrap them in foil, and place each of them in a jumbo ziplock bag. These will last in the freezer for two months.
- The Cream Cheese Frosting can also be made ahead of time and stored in the refrigerator. To soften, allow it to sit at room temperature for about an hour before use. Consider using a mixer to fluff it up if needed.
- The Caramel Sauce can be made ahead of time as well. The caramel sauce should be stored in an airtight glass jar or a microwavable container and will last in the refrigerator for up to three weeks.
- To make the entire cake ahead of time. Store it in a cake container or carefully cover it with plastic wrap. It will last in the refrigerator for up to five days.

Tips for Pumpkin Spice Cake Recipe
- Use parchment paper on the bottom of the cake pans. This prevents your baked cake from sticking to the bottom of the pan and allows it to fall out easily when turned upside down.
- Make cupcakes or mini bundt cakes with the extra batter. This recipe makes more than enough to fill the cake pans with batter to spare.
- How do you tell if the cake is done baking? Two methods to check for doneness: Insert a toothpick into the cake's center; if it comes out clean (with a few crumbs), it's ready. Alternatively, press the cake's center gently; if it springs back, it's fully baked.
- Completely cool the cakes before cutting them. Don't skip this step. If the cakes are still warm, they are more flimsy and fragile to work with.
- Don't throw away the cut dome portions of each cake. These are perfect to throw in the freezer and use later to make a pumpkin trifle. Or, like me, you can stand at the counter and eat it right then.
- Bring the butter and cream cheese to room temperature when making the frosting. This creates a smooth finish for the frosting and prevents it from being lumpy
- How to keep the cake stand clean when frosting. Place three sheets of parchment paper making a triangle on the cake stand before adding the cake layers. This will catch drippings. After frosting the cake, carefully remove each sheet to leave the stand clean.

This irresistible Spice Pumpkin Cake has graced my table on numerous occasions, and without fail, it's drawn gasps of delight from my guests. It's earned a cherished place on my Thanksgiving menu once more. The extra effort that goes into crafting this layered masterpiece is undeniably worth it, as its luxurious richness and decadence are bound to leave everyone craving more.
More Holiday Dessert Recipes
Salted Caramel Pumpkin Cake Roll
Follow me on Pinterest - Linger
PrintPumpkin Spice Cake Recipe

Delectable layers of pumpkin cake frosted with salted caramel cream cheese icing and covered with a glaze of caramel sauce. Top it off with glazed pecans and you have a gorgeous layered cake ready to be displayed on your holiday table.
- Prep Time: 45 minutes
- Cook Time: 55 minutes
- Total Time: 1 hour 40 minutes
- Yield: 16 slices 1x
- Category: Baking
- Method: Oven
- Cuisine: Baked Goods
Ingredients
Pumpkin Cake
- 4 cups All-Purpose Flour
- 3 teaspoons Baking Powder
- 1 teaspoon Baking Soda
- 1 ½ teaspoon Salt
- 3 ½ teaspoons Cinnamon
- 1 teaspoon Ground Ginger
- ½ teaspoon Ground Cloves
- 1 teaspoon Fresh Grated Nutmeg or ½ teaspoon Ground Nutmeg
- ½ teaspoon Ground Cardamon
- 2 - 15 oz Cans of Pumpkin Puree
- 4 cups Sugar
- 1 ½ cups Canola Oil
- 8 Eggs
- 4 teaspoons Pure Vanilla Extract
Salted Caramel Cream Cheese Frosting
- 2 - 8 oz Cream Cheese (room temperature)
- 8 tablespoons Butter (room temperature)
- 8 cups Powdered Sugar
- ½ cup Homemade Salted Caramel Sauce
- ½ teaspoon Vanilla Extract (1 teaspoon if not using caramel extract)
- ½ teaspoon Caramel Extract optional)
- Glazed Pecans for topping
Instructions
For the Pumpkin Cake
- Preheat oven to 350° F.
- Cut pieces of round parchment paper to fit the bottom of 2 - 8-inch round cake pans. Grease the pans and lay the parchment paper in the bottom.
- Add 4 cups all-purpose flour, 3 teaspoons baking powder, 1 teaspoon baking soda, 1 ½ teaspoons salt, 3 ½ teaspoons cinnamon, 1 teaspoon ground ginger, ½ teaspoon ground cloves, 1 teaspoon fresh grated nutmeg (or ½ teaspoon ground nutmeg), and ½ teaspoon ground cardamon to a large mixing bowl and whisk together.
- In another large mixing bowl add 2-15 ounce cans of pumpkin puree, 4 cups sugar, 1 ½ cups canola oil, 8 eggs, and 4 teaspoons pure vanilla extract. Beat well with a hand mixer until the ingredients are combined.
- Add the pumpkin mixture to the dry ingredients and stir until the flour is no longer seen and all the ingredients are combined.
- Pour the batter (¾ full) into two greased round cake pans. There is enough leftover batter to make extra mini bundt cakes or cupcakes.
- Bake for 50-55 minutes until the middle of the cake springs back when touched. (Bake the mini bundt pans for around 25 minutes or cupcakes for 15-20 minutes.)
- Remove and let cool for 5 minutes. Run a knife around the edge of the pans. Invert the pans onto a cooling rack and remove the parchment paper. Let the cakes cool completely before frosting.
For the Salted Caramel Cream Cheese Frosting
- Combine 2-8 ounces packages of cream cheese and 8 tablespoons of butter in a large mixing bowl. Beat until well combined and smooth.
- Add powdered sugar in 2 cup increments until all 8 cups are incorporated. Beat until smooth.
- Add ½ cup cooled caramel sauce, ½ teaspoon pure vanilla extract, and ½ teaspoon caramel extract. Beat until completely combined. Set Aside
Frosting the Layered Pumpkin Cake
- Using a lazy susan or a cake turntable works perfectly when cutting the cakes. Cut off the domed part of the top of both cakes with a long serrated bread knife and discard or freeze for a trifle later.
- Measure halfway up of each round cake and cut horizontally through the middle while turning the lazy susan and continue cutting until completely separated.
- Layer the bottom cake section onto a cake plate and frost with about a cup of cream cheese frosting. Continue with each section but do not add the frosting to the top layer yet.
- When you get to the last layer, create a crumb barrier by frosting the entire cake with a thin layer of icing.
- Set the cake in the freezer for 20 minutes.
- Remove the cake from the freezer and frost the top and the sides with an offset spatula as you turn the lazy susan to get a perfectly smooth surface.
- Press glazed pecans around the bottom of the cake - about 2 inches up from the bottom.
- Return to the freezer for 20 minutes because you want the cake cold when you apply the caramel sauce. The sauce should be slightly warm in order to drizzle well but not too warm that it is runny.
- Work your way around the top edge of the entire cake to make drips down the sides. Then drizzle the rest of the caramel on the top and spread to cover the top of the cake.
- Sprinkle the glazed pecans around the top edge of the cake - about 2 inches in.
- Return the cake to the freezer for 10 minutes until the caramel is well set.
Notes
- Parchment paper prevents your batter from sticking to the bottom of the pan and allows the baked cake to fall out easily when turned upside down. Tear off a large sheet of parchment paper and place the bottom of the cake pan on top of it. Take a marker and mark around its parameter. Cut it with scissors and you have a perfectly fitted sheet to go in the bottom.
- You want to make sure all the spices, sugar, salt, and leavening agent are well incorporated into the flour. Using a whisk or a sifter to combine everything works great.
- Normally you should fill cake pans about ⅔ full and give the batter room to expand. But because I am cutting each of these round cakes to produce a four-layered finished product, I wanted them extra tall. I ended up filling the pans a little over ¾ full.
- This recipe makes plenty of extra batter. Therefore, you are able to make several mini bundt cakes or cupcakes as well.
- There are two ways to tell when the cakes are done. First, use a toothpick and insert it into the middle of the cake. If it comes out clean with no batter marks, then you are good to go. A few crumbs are fine. Secondly, if you gently press in the middle of the cake and it springs back (a pillowy effect), then you know the cake is fully baked.
- Let the baked cakes sit for about five minutes before removing them from the pans. Run a knife around the edge of the pan before inverting them onto a baking rack. Let them completely cool before icing and assembling the layers.
- When mixing the icing, start with room temperature butter and cream cheese and beat them until they are really smooth. This way you'll not end up with lumps in your icing.
- Make sure the salted caramel sauce is completely cooled before adding it to the icing, otherwise the butter and cream cheese will soften too much making it more challenging to frost the cake.
- Make sure the round baked cakes are completely cooled before cutting the layers. If they are still warm, they're more flimsy and fragile to work with.
- Slice off the domed top with a long serrated knife. Using a "lazy susan" or cake turntable helps tremendously when cutting the different layers. Once the domed top is off, eyeball about halfway down the cake and insert your serrated knife horizontally and turn the lazy susan as you saw back and forth.
- If you want to keep the cake stand nice and clean while icing, you can cut three pieces of parchment paper and lay them down in a triangle on the cake stand before placing the cake on top. This way, it will catch all the drippings. When you are finished, carefully pull out each piece of parchment and it will leave you with a spotless stand.
- While icing the first three layers, it doesn't matter if you place the cut side up or down. But when you get to the top layer, use the layer that was the bottom part of the cake. I place the cut side down, giving me a smooth, consistent, even top for my cake.
- A crumb barrier is a thin layer of icing on the top and sides of the layered cake causing all the little crumbs to get caught in this initial icing. Then put the whole cake in the freezer for about 20 minutes until it is nice and firm. This step makes for a clean and crumb-free finished cake.
Nutrition
- Serving Size: 1 large slice of cake
- Calories: 909
- Sugar: 80 g
- Sodium: 619 mg
- Fat: 41 g
- Saturated Fat: 13 g
- Unsaturated Fat: 25 g
- Trans Fat: 0 g
- Carbohydrates: 160 g
- Fiber: 15 g
- Protein: 9 g
- Cholesterol: 138 mg


Eric says
I love salted caramel and pumpkin together. Looks awesome!
Sharon Rigsby says
Kristy, you have outdone yourself with this recipe. It is beautiful and looks delicious!
Kristy Murray says
Thank you so much Sharon! It is ridiculously decadent. I honestly cannot eat but a small slice at a time. But Oh, it sooooo good.
sonja says
Made this for halloween party instead of buying candy treats. It was a hit! Your recipe and hints made all the difference in turning out an impressive cake masterpiece - thank you for your enthusiasm and attention to details! The salted caramel sauce is truly amazing...
Couldn't find glazed pecans in store but found an easy recipe online - simple ingredients and less than 5 minutes to cook. Thanks again:)
Kristy Murray says
Thank you so much Sonja. I appreciate your kind remarks. It takes a little bit of time, but it's so worth it in the end. It is one of my more indulgent desserts. Thanks again.
David @ Spiced says
What a great cake! I'm glad you overcame the feel of layer cakes as this one is a show-stopper for sure. I'm not sure what my favorite part is - the salted caramel, the pecans, the cake itself, the cream cheese frosting. I need this cake on my table during the holidays this year - I'm just not sure I'm willing to share. 🙂
Carrie Tyler says
Kristy, this cake!! The spices, the layers, the flavors! And it looks so incredibly moist. The salted caramel sauce just puts it over the top!
Valentina says
Kristy, this cake is seriously amazing. You've sure been busy in the world of caramel and pumpkin, and I love it! They layers, the spices, and that caramel! It's over the top in the best o f ways. 🙂 ~Valentina
(I think I've said this before, but your photos are so stunning.)
Robin says
I made this cake for Christmas Day. It was perfect! Wonderful flavor and was so moist. I halved the recipe which turned out perfectly for two round cakes.
Thank you for an amazing recipe. I used your recipe for the salted caramel as well. Delicious!
Kristy Murray says
Thank you so much Robin. I'm so happy you enjoyed the cake.
Jeff the Chef @ Make It Like a Man! says
I have to say, this looks like quite a cake! Spice is one thing, but if it actually has puree in it, then I'm into it!
Kristy Murray says
Hi Jeff. I would have to say the pumpkin puree is what makes this cake so moist and flavorful. Thanks for noticing!
Bernadette says
This is way beyond my abilities but the recipe sure is inspirational.
Kristy Murray says
Oh gosh. I guarantee you could make this cake. It is much easier than it looks. Thanks so much for stopping by and leaving a comment. Hope your holidays are wonderful.
Lauren says
This might be the first review I’ve ever left but I had to. This is the BEST cake I’ve ever had. My caramel was a little runny but I think I just took it off the stove too early. The cake got rave reviews at the thanksgiving party I took it to!
Kristy Murray says
Thanks so much Lauren. I'm so happy that you enjoy this recipe. It's probably one of my favorite layered cakes. It definitely is a show stopper. Happy Holidays this year.