
Creamy Classic Crème Brûlée Recipe with Fresh Fruit - the crack of torched sugar, the creamy center of the custard, and the taste of pure vanilla on your tongue, you'll think you've died and gone to heaven. This recipe appears to be all "hoity-toity" and such but in reality, it's quite simple.

Classic Crème Brûlée Recipe with Fresh Fruit - Break Past Intimidation
How many of us have avoided making Crème Brûlée because we've just been too scared to step beyond that imaginary line of intimidation? The name itself is all fancy and French, therefore we think it's way above our "cooking" pay grade. I'm here to break all angst and doubt. Listen, there are four ingredients in Crème Brûlée: FOUR! That's it. (Well, five, if you count the pinch of salt.)
Okay, I confess. I just made this Creamy Classic Crème Brûlée for the very first time a couple of weeks ago. Silly me! I've spent a small fortune over the years on upscale restaurant menus to be able to indulge in this luscious treasure. Therefore, I've searched the vast expanse of the internet and found some really good tips and tricks so you can avoid that pitfall. Here they are:
#1 Use the Yolks of High Quality, Organic Eggs
Let the eggs sit at room temperature before using them. Never use whole eggs in a Crème Brûlée. Recipe. The key to this velvety custard is egg yolks and a lot of them. I used 10 of them in this recipe because I wanted a super creamy filling.
Save the egg whites for another recipe, for instance, meringue or angel food cake. Also, I've found that using an egg separator (as seen below) works great. I use a small prep bowl and separate the egg yolks one at a time dumping each yolk in another bowl.

#2 Use a Vanilla Bean (instead of Vanilla Extract) for the best Flavor.
One of the best parts of this recipe is the vanilla flavor and specks from the vanilla bean. It's a little bit of a splurge because of the cost but it's what makes the flavor difference. (You can substitute 1 teaspoon of pure vanilla extract for the bean.)
Use the whole bean and split it lengthwise careful to not cut all the way through. Open up the bean and run the backside of a knife blade down the bean, removing the paste. Add the whole bean and the paste to the cream in order to infuse the lovely vanilla flavor and specks throughout.

#3 Use whole whipping cream and heat slowly over medium heat.
Use whole whipping cream, not half and half or milk. The richness of the dessert comes from the fats in the heavy cream. Heat the cream, whole vanilla bean/paste, and half the sugar over medium heat just until it begins to bubble around the edges, not to boiling though. It should take 6 to 8 minutes or so. Gently whisk (don't beat) as it is cooking otherwise it incorporates too much air into the mixture.
#4 Temper the egg yolks
Tempering the egg yolks is accomplished by adding a ladle of the heated cream to the beaten yolks. This will prevent the eggs from curdling. Add another couple of ladles and continue to gently whisk in the remaining cream. Strain this mixture through a metal sieve to remove any of the vanilla bean or egg particles. This makes for a smooth and creamy custard.

#5 Use a shallow but larger ramekin (6-inch) dish.
A shallow ramekin helps to cook evenly throughout the custard. If it is too deep, the edges and the bottom will cook quicker, leaving the inner portion slightly uncooked and runny. The most desired reason though is to give more room on the top for that crackly caramel deliciousness.
#6 Use a hot water bath (bain-marie) for a slow cooking process. Be careful not to overcook it.
Evenly fill the ramekins and place them in cake pans. Place the pans in the oven and then pour boiling water about ¾ up the sides of the ramekins. Be careful not to splash any of the water onto the custard. Cook for 40-45 minutes or just until wobbly on the interior. If they're overcooked, they'll become rubbery.
Once you bake the custards, pull them from the hot water bath and set them on a wire rack to cool. Cover them with plastic wrap and chill for about 3 or 4 hours. The custard itself can be prepared and refrigerated a day or two ahead of time.

#7 Invest in a kitchen torch.
Crème Brûlée means "burnt cream," thus the need for the torch. You can use the broiler, but the results will just not be the same. Sprinkle a tablespoon of sugar evenly over each custard-filled ramekin. Using your torch, position it about 3 inches above the ramekins and work quickly over small areas as not to melt the custard itself. Continue torching the entire surface until it has a nice dark caramelization.

#8 Serve Immediately after torching the sugar.
The caramelization with the torch should be done on the chilled custard just before serving. If it sets too long the hardened surface will liquefy. Trust me on this. I left one overnight to enjoy the next day and the top was runny and ruined. Ugh, I never got my second helping.
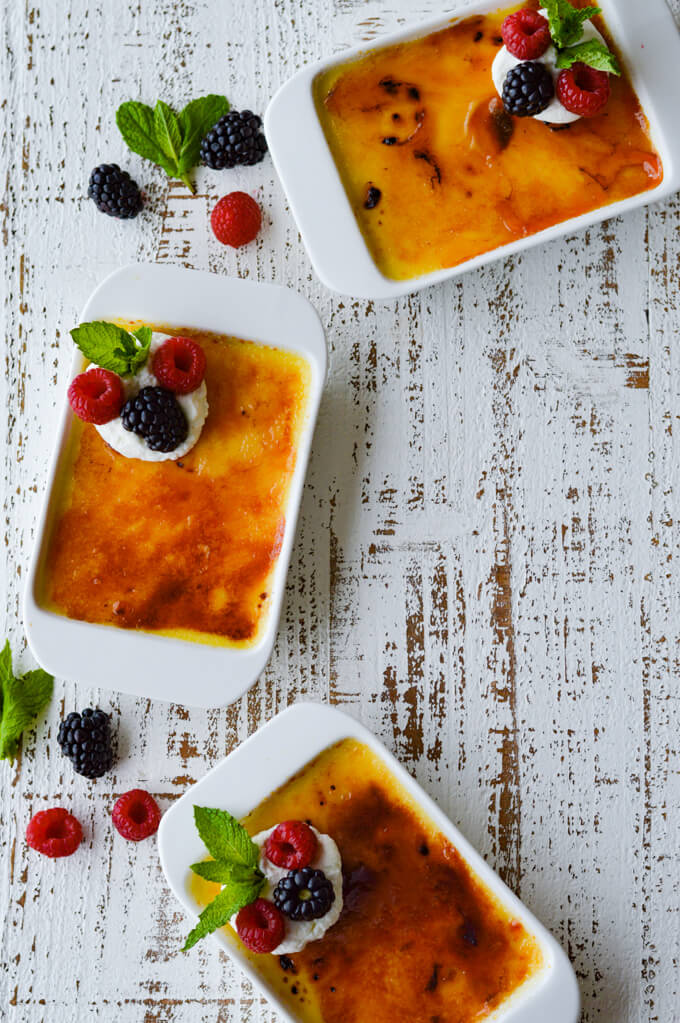
Fresh fruit is a wonderful companion to this indulging dessert. The sweetened whipped cream cradles the fruit and mint leaves. What a lovely presentation for the finale of any special occasion. Personally, I would set a bowl of the fresh berries alongside the dessert because who wouldn't love that additional accompaniment. So, there you have it, a Classic Crème Brûlée Recipe with Fresh Fruit. Pure Indulgence!
Please consider following me on Facebook: Lingeralittle
If you would like some additional enticing desserts, check these out:
Keto-Friendly Expresso Chocolate Pudding
Caramel Drunken Apple Galette
Peach Upside Down Cake
Churros and Spanish Hot Chocolate
PrintClassic Crème Brûlée Recipe with Fresh Fruit

Classic Creamy Crème Brûlée with Fresh Fruit - the crack of torched sugar, the creamy center of the custard, and the taste of pure vanilla on your tongue, you'll think you've died and gone to heaven.
- Prep Time: 15 minutes
- Cook Time: 55 minutes
- Total Time: 1 hour and 10 minutes
- Yield: 6 servings 1x
- Category: Desserts
- Method: Stove Top
- Cuisine: French
Ingredients
- 10 Egg Yolks
- ¾ cup Sugar, divided
- 1 Whole Vanilla Bean (1 teaspoon of Pure Vanilla Extract)
- 4 cups Whole Whipping Cream
- Pinch of Salt
- Sweetened Whipped Cream, (optional for garnish)
- Fresh Berries (optional for garnish)
- Mint Leaves (optional for garnish)
Instructions
- Preheat the oven to 300° F.
- Pull the eggs from the refrigerator and sit until room temperature. Whisk the eggs and ½ the sugar together until just combined.
- Use the whole bean and split it lengthwise careful to not cut all the way through. Open up the bean and run the back side of a knife blade down the bean, removing the paste.
- Add the whole bean, vanilla paste and remaining sugar with the whole whipping cream to a medium-size saucepan.
- Slowly heat the cream mixture over medium heat just until it begins to bubble around the edges, but not to boiling. It should take 6 to 8 minutes or so. Gently whisk (don't beat) as it is cooking otherwise it will add too much air to the custard.
- Add a ladle of the heated cream mixture to the beaten eggs yolks and gently whisk. Continue to one or two ladles at a time. Continue to gently whisk in the remaining cream. Add a pinch of salt.
- Strain the custard in a metal mesh strainer to remove the vanilla bean and any egg particles.
- Evenly pour the custard into shallow six-inch ramekins. Place the ramekins cake pans and place the pans in a 350° F oven and pour boiling water into the pans up to ¾ the side of the ramekins.
- Cook for 40-45 minutes or just until the interior is wobbly.
- Remove the cake pans from the oven and place the ramekins on a wire rack to cool.
- Once they are cooled, cover them with plastic wrap and chill for 3 or 4 hours. The custard itself can be prepared and refrigerated a day or two ahead of time.
- When ready to serve, pull the chilled ramekins out of the refrigerator. Sprinkle 1 tablespoon evenly over each custard.
- Using a kitchen torch, work quickly with back and forth motions to burn the sugar until it is caramelized on top. Be careful though not to melt the custard in the process. Serve immediately.
- Garnish with sweetened whipped cream, fresh berries, and mint leaves. (optional)
Notes
- Let the eggs sit at room temperature before using. Never use whole eggs in a Crème Brûlée. The key to this velvety custard is egg yolks and a lot of them.
- Use whole whipping cream, not half and half or milk. The richness of the dessert comes from the fats in the cream.
- Use the whole bean and split it lengthwise careful to not cut all the way through. Open up the bean and run the back side of a knife blade down the bean, removing the paste.
- Tempering the egg yolks is accomplished by adding a ladle of the heated cream to the beaten yolks. This will prevent the eggs from curdling.
- Gently whisk (don't beat) while cooking the custard over the stove otherwise, it incorporates too much air into the mixture.
- A shallow ramekin helps to cook evenly throughout the custard. If it is too deep, the edges and the bottom will cook quicker, leaving the inner portion slightly uncooked and runny.
- Using your torch, position it about 3 inches above the ramekins and work quickly over small areas as not to melt the custard itself.
- Using your torch, position it about 3 inches above the ramekins and work quickly over small areas as not to melt the custard itself.
- The caramelization with the torch should be done on the chilled custard just be serving. If it sets too long the hardened surface will liquify.
Nutrition
- Serving Size: 1 6-inch ramekin
- Calories: 460
- Sugar: 27 g
- Sodium: 46 mg
- Fat: 37 g
- Saturated Fat: 21 g
- Unsaturated Fat: 14 g
- Trans Fat: 0 g
- Carbohydrates: 27 g
- Fiber: 0 g
- Protein: 6 g
- Cholesterol: 417 mg


Eric says
This recipe looks amazing. Also, love your photos.
Kathleen McCallister says
My absolute FAVORITE dessert in the WHOLE world~I can't wait to try it!
Kristy Murray says
Kathleen, you're so sweet! It's totally my favorite as well. Hope you enjoy.
Niki Medlin says
What a great post, Kristy! I love creme brulee, and I love the photos!